
A short while ago I posted on Facebook about finding a personal cloud solution that gave me piece of mind. Last year we saw Apple’s iCloud get compromised, showing us that using these kind of services to store our data might not be the best option. How long till services like Google Drive and DropBox get compromised? Both of which I have no quarrel with and have used for a very long time without issue… But at the same time I am putting the projection of my documents in someone else hands.
There are of course many solutions out there, like Western Digitals MyCloud which is definitely a better option, as it puts the cloud directly in your home. The 2TB model costs ~$150 and up. However I don’t need that much storage soace for a few documents I want to care everywhere I go, like my resume, my KeePass database, and a few other important files. I just want a small cost effective solution, that I can afford on a monthly basis. One that I can control and feel that my data is kjept safe and out of prying hands.
In comes DigitalOcean and OwnCloud. OwnCloud is a community available cloud software which has clients for Windows, Mac, Linux, Android and iPhone to keep you synced on all your devices (Except Windows Phone and Blackberry… sorry guys). If you already have a server you are paying for, and it has a desireable amount of space, you might want to install it on your own server, however, from what I have heard from folks trying to set it up on their own, they run into issues. If you have the knowledge have at ‘er. However, if you would like a cost-effective virtual server solution that has OwnCloud as a one click install option, then DigitalOcean is your best option. At $5 a month you can have ~$15GB of space for your own personal cloud (you get 20GB for the server, but ~5GB is used by the Operating system and applications such as LibraOffice, I will explain the latter later). The best part is, if you click this link here you get $10 deposited into your account… consider it a 60 day trial (They deposit $10 into your account for you). If you like it, keep with it, if not you can cancel your “Droplet” and you won’t be charged for any more time. The nice thing about DigitalOcean is they charge per hour, so its great for developers who just want to boot up a virtual server for testing.
The combination of DigitalOcean and OwnCloud puts the cloud in your hands. All it takes is a little bit of knowledge, or the ability to follow instructions. In this case, the latter as I will explain everything bit by bit, so no experience is really necessary. And in the end, you have a cloud system that is your own. You have control. I will also cover ways to make it more secure.
So, lets get started on how to create your very own Cloud…
The Initial Setup
Step 1: Create your account at DigitalOcean.
This is pretty self explanatory, just fill out the form as they ask. Note: They will ask for valid credit card info, but they won’t charge you anything (if you clicked any of the links above as it will give you $10 free).
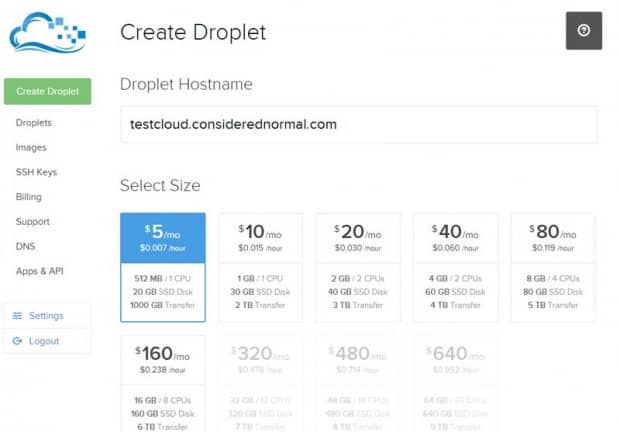
Step 2: Create your Droplet via the interface
- Enter Your Desired Name, if you have a domain, name it something like cloud.yourdomain.com or storage.yourdomain.com, if you don;t you can name it what ever you want, and just connect to it via its IP.
- Select the package, for basic files and such you should not need more than the $5 option
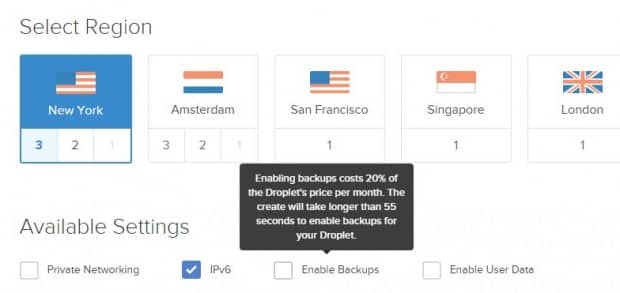
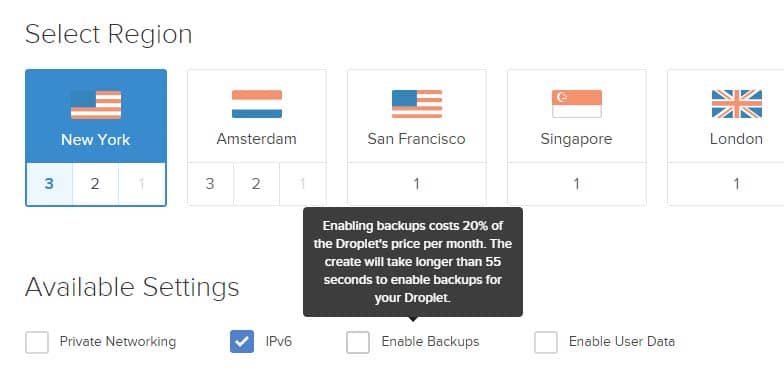
- Scroll down and select your prefered region
- Select addition settings. I chose only IPv6, if you want to select backups, note it will cost you 20% ($1) extra per month.
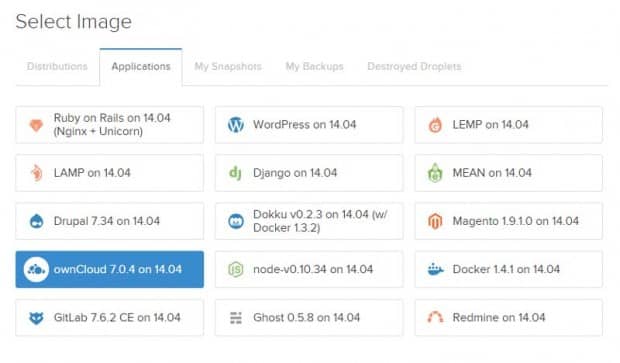
- Scroll down, under Select Image, click on “Applications” and select the “OwnCloud” option.
- Scroll down once more, ignore the Add SSH Keys, this for what ever reason didn’t work for me, and we will be generating our SSH Keys later through the console.
- Click Create Droplet.


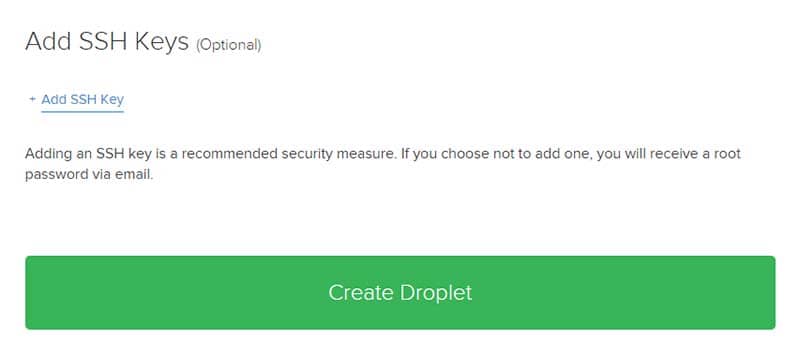
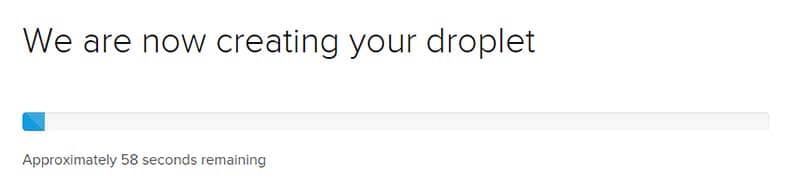
In about 60 seconds, your new Own Cloud server will be installed.
Advanced Settings
Step 1: Check Your Email
In your Email you will find your server credentials:
Droplet Name: testcloud.considerednormal.com
IPv4 Address: 104.131.78.XXX
IPv6 Address: 2604:A880:0800:0010:XXXX:XXXX:XXXX:XXXX/64
Username: root
Password: XXXXXXXXXX
Step 2: Log in to your new server
Open up your favourite SSH Client, for the first login I recommend Putty as it is fast and easy to use, however later on we will switch over to Bitvise for its ability to easily store and use SSH Keys.
- Using the info from the email, connect to your server:
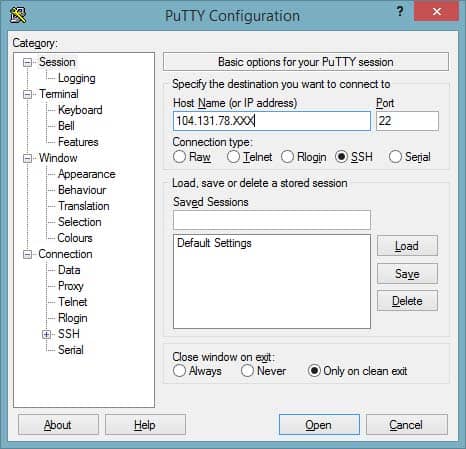
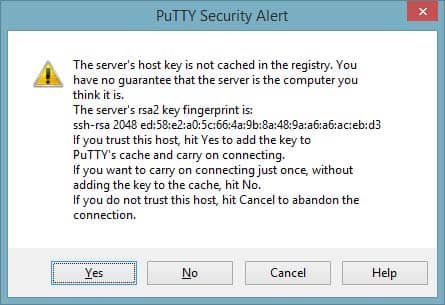
- Once you click Open, a black console screen will appear along with a Security Alert, click OK to the alert
- You will be presented with a login prompt, use root as the username and the password you received in the email. Note: You will not indicate your password being typed on the screen.
- Once you are logged in, the Message of the day will appear:
You are required to change your password immediately (root enforced)
————————————————————————————-
Thank you for using DigitalOcean’s OwnCloud Application.Your OwnCloud instance can be accessed at http://goo.gl/VJiPDp
Your OwnCloud login credentials are:
Username: admin
Password: XXXXXXXXX
————————————————————————————-This will show you the info required to log into your Cloud for the first time – Write this down. At the end of it, it will also prompt you to change your root password. Again, note, that it will not make any indication that you are typing your password, so be carefull.
- Once you have changed your password, type in the word clear to clear the console.
Step 3: Create your SSH Keys
This is a very important step, as this will create keys used to connect to the console, it helps secure your connection.
- First at the console you will type:
ssh-keygen -t rsa
- The the next prompt asking you to enter a file name, just hit enter:
Generating public/private rsa key pair.
Enter file in which to save the key (/root/.ssh/id_rsa): - It will then ask you for a passphrase, this is important, its like a password, but its sole purpose is to unlock the key when you try and use it. Try and use something memorable, or you won’t be able to connect remotely. You can still use the console from your Digital Ocean account interface.
Enter passphrase (empty for no passphrase):
Enter same passphrase again: - Once successful it will give you the locate of the files and the fingerprint:
Your identification has been saved in /root/.ssh/id_rsa.
Your public key has been saved in /root/.ssh/id_rsa.pub.
The key fingerprint is:
30:25:e9:1c:8f:XX:XX:XX:XX:XX:XX:XX:XX:XX:XX:XX root@testcloud.considerednormal.com - Next, you will need to copy the SSH Public Key:
ssh-copy-id root@104.131.78.XXX
You should see it generate something like the following:
The authenticity of host ‘104.131.78.XXX (104.131.78.XXX)’ can’t be established.
ECDSA key fingerprint is ec:37:f9:ab:XX:XX:XX:XX:XX:XX:XX:XX:XXX:XX:XX:XX.
Are you sure you want to continue connecting (yes/no)? - Type “Yes”, if you just type “y” it will ask you to spell out the full word. You will then see the following
/usr/bin/ssh-copy-id: INFO: attempting to log in with the new key(s), to filter out any that are already installed
/usr/bin/ssh-copy-id: INFO: 1 key(s) remain to be installed — if you are prompted now it is to install the new keys
root@104.131.78.XXX’s password:You will then enter your root password – NOT the passphrase you just created. Upon succeeding you will see the following:
Number of key(s) added: 1
Now try logging into the machine, with: “ssh ‘root@104.131.78.105′”
and check to make sure that only the key(s) you wanted were added. - Now you will need to copy the key to a file on your desktop so you can use Bitwise to connect.
First you will need to display the key:cat /root/.ssh/id_rsa
This will display something like the following:
1234567891011121314151617181920212223242526272829-----BEGIN RSA PRIVATE KEY-----Proc-Type: 4,ENCRYPTEDDEK-Info: AES-128-CBC,A8377081FE6B2E11D0445866452BEBC4Fy7wrlZ14NK+MDJUb+HW4eZh9dd2J3+Aof48JRk9YAzYrx3WmicsAsubSIsrZOsc478QtMhteUIXleBHyNgVXUv82KxZstGhNOdg3yTqztlxf4j1tEXW/iqv2+pKvjYUusX7QlD0pf/SQjxIyJZx+ca0nOrUITRHHTRaIo479etHKxgselvMP+SLafxjhHJVWmEtsWRHZvVVwhVXIK74xFho7ofqyNHCZQ6T5ZBggNI5TMjOZTBKal3awEN8p5nX4cVdriLqp9mNrMyTuWsPd5yWc/Ocb9ii3ShIIt9rP+2o5M00k7OzNzn1JD0bD97APc8fiTbnHFeMRrdryDd9yxp6ldb1cu1uxZ0jE0azHu9FpBRgB+inrZZEl6ylI01EXXXXXXXXXXXXXXXXXXXXXXXXXXXXXXXXXXXXXXXXXXXXXXXXXXXXXXXXXXXXXXXXXXXXXXXXXXXXXXXXXXXXXXXXXXXXXXXXXXXXXXXXXXXXXXXXXXXXXXXXXXXXXXXXXXXXXXXXXXXXXXXXXXXXXXXXXXXXXXXXXXXXXXXXXXXXXXXXXXXXXXXXXXXXXXXXXXXXXXXXXXXXXXXXXXXXXXXXXXXXXXXXXXXXXXXXXXXXXXXXXXXXXXXXXXXXXXXXcTjJnYXl4czGMvTcMgkqhSqab/Z2beLBxMrnqw1WvcEVdqzxBhApqgdm1TVF/AwBmF1mnAqybzn3MOSSJb51egTfMzS1QQM+DIcU8SwVl+fcp4eiV9oS5BPBJg3FZwapg2gu+E5T0t0XqAjd0oeul6UVU1FhMVyeVH6qBG1IwFFzMMdYv+jVmeEcStZptICEqJ7MqZqGxvV09Wvfpf7F2xMKJ5ozLKTCdsUoG93/kH65kB7IG0zrx29UmSavbEbNXXXXXXXXXXXXXXXXXXXXXXXXXXXXXXXXXXXXXXXXXXXXXXXXXXXXXXXXXXXXXXXXXXXXXXXXXXXXXXXXXXXXXXXXXXXXXXXXXXXXXXXXXXXXXXXXXXXXXXXXXXXXXXXXXXXXXXXXXXXXXXXXXXXXXXXXXXXXXXXXXXXXXXXXXXXXXXXXXXXXXXXXXXXXXXXXXXXXXXXXXXXXXXXXXXXXXXXXXXXXXXXXXXXXXXXXXXXXXXXXXXXXXXXXXXXXXXXXG9hxQM0RJnlBUDwsdBo7cqsjTAdDfXkqVVoTA+lRwTXdJiocyBrqTPSlsnqJWc1Qy/YQQVg6fHty48p5tu6Kgq0uAZlKfiNiBZFSguPdxsrHts+DkA5ywEfOQLoPlli4YeIXYwjvO1dAoEuv59g7uH1YxNJVARUzaMpAwSKscC4RMkGnXzHoVvUKEoS2auhNHGqDNXMsxEmUZyYtRJxqw7ddA+OvduBRKpTWkbFryRQwkjVfLb/o41r1Lw0CnzAsafmWS89ZYoGn54lyRUtWE2Rmp/AYsyWvPFM30wrPFR3KbrUiwQ7rho+x5xZJuqUNnzHRzqyf9dtJbwWGYIXOKLx+PvsodGTMF+v55aoHS6hbIIt+5p9NShaqApI0AxqWmg7BbYlD1lhpaWTLzeLsF5kPuz9u44RK3r1M6z0nXzXIuV4XHgf5SIiKU/IxlGk3-----END RSA PRIVATE KEY-----Copy it from Putty by highlighting it and hitting control+C (ctrl+c)
Then open up notepad and pasted it, save the file as root.ppk.
Step 4: Disable Password Login
Now that we have the key backed up on out local system, we can lock out password access in the SSH config file.
- Open the sshd_config file in the console
vi /etc/ssh/sshd_config
Note if you are used to Linux, you can use any editor, I am most familiar with VIM, however Nano and Pico can also be used.
- Search for the entry “PermitRootLogin”
/PermitRootLogin
- Hit “i” yo activate Insert capability (allows you to modify the file), and change “Yes” to “without-password” (without quotes)
- hit the “esc” key and type “:wq” (without quotes)
- Next you will need to restart the SSH server
reload ssh
Now download and open Bitvise, click on the link that says “Use Keypair Manager”. Once the manager shows up, select import and select the .ppk file you created.
You can now close the manager once the key is imported and enter your servers information to connect. You can use the IP Address sent you by mail, but as I already own a domain and have access to the DNS Servers, I created an A Name entry for my server.
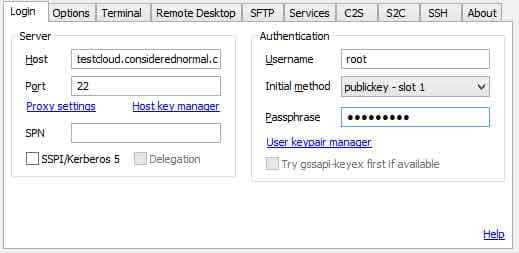
Don’t forget the passphrase you created, as you will need to enter it every time you connect. Once you hit the Connect button you should see a console window show up and an SFTP window (by default Bitvise opens both).
Installing LibraOffice
Step 1: Just install it
LibraOffice will allow you to preview and create word documents
add-apt-repository ppa:libreoffice/ppa
apt-get update
apt-get install libreoffice
yum install libreoffice
yum install libreoffice_headless
in /var/www/owncloud/config/config.php add
‘preview_libreoffice_path’ => ‘/usr/bin/libreoffice’,
‘enable_previews’ => true,
Installing SSL
Another security step is making sure that your connections are encrypted. DigitalOcean has a great tutorial on this here. Follow their instructions starting at Step-1. you do not need the prerequisites as Apache is already installed.
Finalize the Configuration
Now that we have all the settings and security configured, its now time to open up our admin interface and finalize the settings.
- Login using the admin credentials we saw at first login to SSH
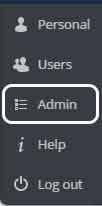
- Under the Admin username in the top right corner, select the “Admin” link
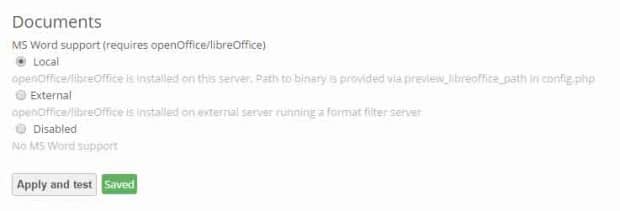
- Scroll down to the “Documents” Section and Select “Local”. This is why we installed LibraOffice, it allows us to modify Microsoft Word documents right on the screen. When you hit “Apply and test” it should show a green box just to the right that says Saved.
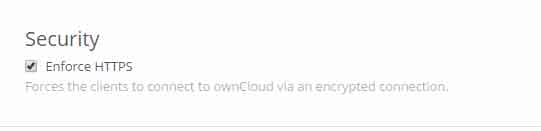
- Scroll down to the Security Section and check the “Enforce HTTPS” option. This will ensure every connection is over SSL and is encrypted.

That’s it. You can now add users from the admin menu and start uploading your files.
Don’t forget, you get $10 added to your account when you use this link!