Preface
I have been waiting for a long time to write this post. In order to test this out, I needed to upgrade my home lab. I had a VM machine running XCP-NG (I tried Proxmox, it’s just not the same), but it had an old dual core Intel and 8GB of ram, so not much I could do with other than host a good single VM… which is pointless, the server might as well be the function of that single VM. So recently I was able to upgrade my main system to a Ryzen 5 5600X with a new mobo, RAM, and PSU, so I figured I would use my old Ryzen 5 1600X in the server. So now I have 6 cores which translated to 12 Threads (each of which can be used as a virtual CPU), 32GB of RAM, and more then enough resources to make a few VMs with multiple purposes. The first of which of course was a Linux based Active Directory.
Video
Prerequisites
- Ubuntu Server (20.04/22.04)
- A user account with sudo privileges
- A Windows 10 PRO computer on the same network
- A Linux Desktop on the same server (Fedora or Ubuntu based)
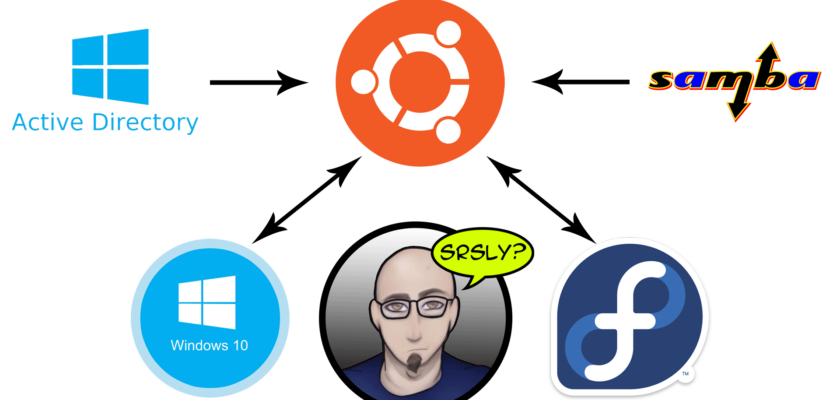
In this example will be using Ubuntu 22.04 Server for the Active Directory. We will be connecting to it with a Windows 10 PRO client as well as Fedora as the Linux based client
DC Server Setup
Set the Server Hostname
For this demonstration we will be using the hostname dc1 for the Ubuntu server
|
1 2 |
# set up the hostname hostnamectl set-hostname dc1 |
Add Server to Hosts File
We will also need to modify the hosts file, add the following line to /etc/hosts
|
1 2 |
# setup FQDN dc1.cn.lan 192.168.0.254 dc1.cn.lan dc1 |
Verify Hostname
You can quickly verify everythign worked with the following command
|
1 2 3 4 5 |
# verify FQDN hostname -f # verify FQDN is resolved to the Samba IP address ping -c3 dc1.cn.lan |
Disable the DNS Resolver
Disable the DNS Resolver and unlink the config
|
1 2 3 4 5 |
# stop and disable systemd-resolved service sudo systemctl disable --now systemd-resolved # remove the symlink file /etc/resolv.conf sudo unlink /etc/resolv.conf |
Create our own Resolv.conf
|
1 2 |
# create a new /etc/resolv.conf file touch /etc/resolv.conf |
Enter the following into /etc/resolv.conf
|
1 2 3 4 5 6 7 8 |
# Samba server IP address nameserver 192.168.0.254 # fallback resolver nameserver 9.9.9.9 # main domain for Samba search cn.lan |
Make the file immutable
As we do not want anything to change this file automatically, we make it immutable so that it does not get modified
|
1 2 |
# add attribute immutable to the file /etc/resolv.conf sudo chattr +i /etc/resolv.conf |
Installing Samba
|
1 2 |
sudo apt update sudo apt install -y acl attr samba samba-dsdb-modules samba-vfs-modules smbclient winbind libpam-winbind libnss-winbind libpam-krb5 krb5-config krb5-user dnsutils chrony net-tools |
Enter the appropriate info
|
1 2 3 4 5 6 7 8 |
# Default Kerberos Verion 5 Realm: CN.LAN # Kerberos Servers for your realm: dc1.cn.lan # Adminitraive server for your Kerberos realm: dc1.cn.lan |
Disable Samba Services
|
1 2 |
# stop and disable samba services - smbd, nmbd, and winbind sudo systemctl disable --now smbd nmbd winbind |
Activate samba-ad-dc
|
1 2 3 4 5 |
# activate samba-ad-dc service sudo systemctl unmask samba-ad-dc # enable samba-ad-dc service sudo systemctl enable samba-ad-dc |
Configuring Samba Active Directory
First backup the original smb.conf file
|
1 |
sudo mv /etc/samba/smb.conf /etc/samba/smb.conf.bak |
Provision the Active Directory
|
1 2 |
# provisioning Samba Active Directory sudo samba-tool domain provision |
Enter the following info
- On Realm prompte – <Enter>
- On Domian Promp – <Enter>
- On Server Roll – <Enter>
- On DNS Backend – <Enter>
- DNS Forwarding IP – 9.9.9.9
- Enter an Admin Password
Backup and replace the Kerberos Config
|
1 2 3 4 5 |
# rename default Kerberos configuration to krb5.conf.orig sudo mv /etc/krb5.conf /etc/krb5.conf.orig # copy the Kerberos configuration generated by the samba-tool sudo cp /var/lib/samba/private/krb5.conf /etc/krb5.conf |
Start samba-ad-dc
|
1 2 3 4 5 |
# start samba-ad-dc service sudo systemctl start samba-ad-dc # verify samba-ad-dc service sudo systemctl status samba-ad-dc |
Set up Time Synchronization
Set permissions
|
1 2 3 4 5 |
# allow group _chrony to read the directory ntp_signd sudo chown root:_chrony /var/lib/samba/ntp_signd/ # change the permission of the directory ntp_signd sudo chmod 750 /var/lib/samba/ntp_signd/ |
Update Chrony
add the following to /etc/chrony/chrony.conf
|
1 2 3 4 5 6 7 8 |
# bind the chrony service to IP address of the Samba AD bindcmdaddress 192.168.0.254 # allow clients on the network to connect to the Chrony NTP server allow 192.168.0.0/24 # specify the ntpsigndsocket directory for the Samba AD ntpsigndsocket /var/lib/samba/ntp_signd |
|
1 2 3 4 5 |
# restart chronyd service sudo systemctl restart chronyd # verify chronyd service status sudo systemctl status chronyd |
Verifying Samba Active Directory
Run the following to verify
|
1 2 3 4 5 |
# verify domain example.lan host -t A cn.lan # verify domain dc1.example.lan host -t A dc1.cn.lan |
Then verify the Kerberos and ldap services
|
1 2 3 4 5 |
# verify SRV record for _kerberos host -t SRV _kerberos._udp.cn.lan # verify SRV record for _ldap host -t SRV _ldap._tcp.cn.lan |
Then verify the Samba resources
|
1 2 3 4 5 |
# verify SRV record for _kerberos host -t SRV _kerberos._udp.cn.lan # verify SRV record for _ldap host -t SRV _ldap._tcp.cn.lan |
Lastly KINIT
|
1 2 3 4 5 |
# authenticate to Kerberos using administrator (MUST BE IN CAPS) kinit administrator@CN.LAN # verify list cached Kerberos tickets klist |
Create your first user (Optional)
The reason why this is optional, is you have more options when adding a user through the Remote Server Administration Tools (RSAT) on Windows.
|
1 2 3 4 5 |
# create a new user in Samba sudo samba-tool user create mkoster # checking users on Samba sudo samba-tool user list |
Windows Setup
PreCheck
- Set Computer Name
- Set DNS/IP, The first DNS should be your Samba Server set up above
Verify DNS resolver
|
1 2 3 4 5 6 7 8 |
# In Powershell Get-DnsClientServerAddress # ping the AD domain dc1.cn.lan ping dc1.cn.lan # ping the AD domain cn.lan ping cn.lan |
Add Server to Directory
|
1 2 |
# add Windows 10 to Active Directory using POWERSHELL Add-Computer -DomainName "cn.lan" -Restart |
Install RSAT to administer domain from Windows
Download RSAT tools <– For Windows 10 – Could not find a DL source for Windows 11, something I need to look into.
Linux Setup
Precheck
- On Ubuntu, you may need to add the Universe repositories
123sudo add-apt-repository universesudo add-apt-repository multiversesudo apt update
Set Hostname
|
1 |
sudo hostnamectl set-hostname fedora.cn.lan |
Modify Resolved info
On Fedora edit the Resolved config (This works on Ubuntu as well, old editions you may need to change the /etc/resolv.conf file)
|
1 2 3 4 5 6 7 |
vi /etc/systemd/resolved.conf #add the following [Resolve] DNS=192.168.0.254 9.9.9.9 8.8.8.8 sudo systemctl restart systemd-resolved |
Install required packages (Ubuntu Only)
For Ubuntu Only
|
1 |
sudo apt -y install realmd libnss-sss libpam-sss sssd sssd-tools adcli samba-common-bin oddjob oddjob-mkhomedir packagekit |
Discover the Domain (Optional)
|
1 |
sudo realm discover cn.lan |
Join the Domain
|
1 |
sudo realm join -U Administrator cn.lan |
For Windows 10 version 1809 and all later versions, Windows 11 included, the RSAT tools are now a Features on Demand install vs the old download method. Annoying but usually works ok unless your computers are behind a proxy server and have WSUS on the network, which then needs some Group Policy settings changed.
This is a really awesome tutorial. Thank you so much for adding this. Can you use this, or similar methodology to join an existing Windows domain?
To be honest, never tried. Although I know that Fedora has a built in way to connect to a windows domain, I am not sure about other linux flavours.
is it possible running DNS service ? like bind 9 ?
RSAT tools on Windows 10 and 11 can be installed by going to Settings > Apps > Optional Features > Add an optional feature > View features > search RSAT and tick what you need. Hope this helps! 🙂
I have used this and it works GREAT!! How do I add a second so there is 2 DCs not just one?
Sorry for such a late reply. I have never tested setting up a second DC. I have done it with Windows Server 2012 but never with Samba… Might be something I will try in the future.
Thanks for the guide! After learning how to do this myself, and then finding your guide reassured me that things were done the right way.
I`m currently looking for some guidance to a guide or good reading material for my current exercise: I have a much older version of samba (4.3.11) that I need to update to the latest version.
The current, outdated samba instance is live so it cannot afford any downtime.
Before I attempt to update my old DC, I want to migrate it’s users and groups to this new instance so that I have a fallback incase things go wrong.
Perfectly working thanks bro 🙂
In windows 11 I can not find the dc:
ping dc1.cn.lan
Ping request could not find host dc1.cn.lan. Please check the name and try again.
ping cn.lan
Ping request could not find host cn.lan. Please check the name and try again.
Any ideas?
Sounds like a DNS issue. Make sure your DNS is set as the Samba server and not something else.
So when I ping 192.168.0.254, it says it’s unavailable. I put my IP address in there and the ping works fine. However when I do host -t A cn.lan it says Host cn.lan nof found: 3(NXDOMAIN).
what do I do to fix this?
You need to make sure your server IP is set to 192.168.0.254. You can change this to whatever you want, I used 192.168.0.254 only as an example as I usually set higher IPs for servers and lower IPs for clients (for example 192.168.0.10), but others reverse that. You can find the server’s ip by using the “ip a” command or “ifconfig” if net-tools is installed.
Also, you do not need to use cn.lan, again this was an example, as cn stands for Considered Normal. Hope this helped.
This isn’t working for me. After I create the new resolv.conf file and set the nameserver to the IP of the server I am creating of 172.16.8.53, I lose access to the internet and can’t do any updates. What am I doing wrong?
# Samba server IP address
nameserver 172.16.8.53
# fallback resolver
nameserver 9.9.9.9
nameserver 1.1.1.1
# main domain for Samba
search xxxxxxxx.com
Password for administrator@domain.local:
KDC reply did not match expectations while getting initial credentials
Did you get solution to above?
Works great! Thank you.
Mayble some file sharing and GPO next?
Cheers!
It’s important to consider more modern approaches to network configuration on Ubuntu systems. Instead of directly modifying the
/etc/resolv.conffile, which may be overwritten by network management tools or breaks the network, consider the following steps:1. Disable the stub listener in
systemd-resolvedto prevent it from managing DNS resolution:sudo systemctl edit systemd-resolved
Add the following lines to the editor:
   [Resolve]

   DNSStubListener=no
Save the file and exit the editor.
2. Restart the
systemd-resolvedservice to apply the changes:sudo systemctl restart systemd-resolved
3. Manage DNS configuration using
netplan, Ubuntu’s preferred method:sudo nano /etc/netplan/00-installer-config.yaml
Inside the file, specify your DNS servers under the
nameserverssection. For example:network:
ethernets:
ens18:
addresses:
- 192.168.0.10/24
nameservers:
addresses:
- 192.168.0.10
- 8.8.8.8
search:
- cn.lan
routes:
- to: default
via: 192.168.0.1
version: 2
Save the file and exit the editor.
4. Apply the changes made with netplan:
sudo netplan apply
By following these steps, you ensure that DNS configuration remains consistent and resilient to changes, aligning with best practices for network management on Ubuntu systems.
Good Morning Sir, Great Video I wish you could do more about this same topic.
Right now I am trying to make a DC and print and file share on Ubuntu server 24.04.
if you can give me some tips I would really appreciated.
Thank you and have a wonderful Sunday!
Great tutorial. Works like a charm.
One thing i spotted on here:
The sections for “Then verify the Samba resources” is the same commands as “Then verify the Kerberos and ldap services”
It should be:
“smbclient -L cn.lan -N”
Hey , great tutorial
I am installing samba ad dc on ubuntu 24.10 (on raspberry pi/ARM) and I think that something may have changed, as I needed to install package for ad dc server explicitly , i.e.
sudo apt install samba-ad-dc
maybe want to update the package list above as this may indeed have been a dependency before? Or maybe a remark in case this is different for eg amd64
While following your tutorial I had to add unixattributes to each user (GID, UID, localhomedir) to be able to logging with Linux and I add
pam-auth-update --enable mkhomedirfor kali to be able to log in. I don’t know weather it worked in server level Ubuntu hadn’t any issue with making home dir and in kali I also I addrealm permit, I haven’t check on new profiles.– Also I would like to have a tutorial of making roaming profiles for windows using samba.
while trying I come to issue windows saying that I have to sign-out and sign in again, but Each time it says preparing windows and getting a new temporary account with the same issue. for previously sign on account(Admin) I was able to login but it says there is a problem with roaming profile and only logged into local account.
I don’t know how many instructions I’ve tried. The video looked great, but I can’t get it to work. After running the command “sudo systemctl unmask samba-ad-dc,” I get the error “Unit samba-ad-dc.service does not exist, proceeding anyway.” I reinstalled Ubuntu, going through everything step by step, but it still runs into an error at the same point.
Ich habe es rausgefunden. Beim Installationsaufruf für Samba fehlte die Option “samba-ad-dc”. Dann läuft es korrekt ab.
What about for CentOS client?.. how to configure ? tnx.
Thanks ! Works like charm for me, there was issue during the installation because of bind9 package that installed previously on my ubuntu which seem conflicting with Samba DNS config , disable and remove the bind service sorted out the issue.
When testing new created user on windows 11, first time login to windows taking very long (likely 20 min) , is that normal ?
My “smbclient -L domain.local -N” command failes. However, if I use my FQDN, it works “smbclient -L dc1.domain.local -N”. The dig command shows the following:
domain.local. 900 IN A 192.168.1.1
I’m unable to ping domain.local but again, I can ping my FQDN. What am I missing?
After running nslookup for examle 192.168.2.170 i got error (root) ??? unknown type 41 ???
Server: UnKnown
Address: 192.168.2.170
(root) ??? unknown type 41 ???
*** No internal type for both IPv4 and IPv6 Addresses (A+AAAA) records available for 192.168.2.170