Recently, I have begun to pay more attention to my “Home Lab” as I strive to deepen my knowledge of the digital world. One of the first things I was looking to do was to strengthen my network protection. Like most folks, I have my internet provider’s modem/router as the only protection for my network. So to fix this, I was looking into open-source solutions. One of these solutions was OPNsense.
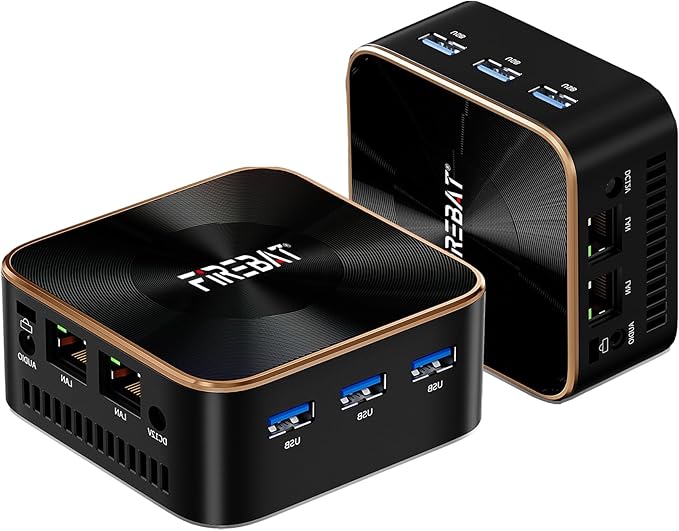
My FIREBAT Mini PC with Dual NIC card
I had just received my FIREBAT Mini PC (pictured above), which had dual NIC cards and wanted to implement a strong firewall. I had heard a lot about OPNsense online, and did my research into a few of the top choices. I narrowed it down to OPNsense and pfSense, which were both very good products, and each had the features I was looking for. For no other reason than my own curiosity, I chose OPNsense. But I ran into a bit of an issue. After downloading the OPNsense ISO, none of my programs would properly write it to a USB. My first attempt was the ever-popular Rufus:
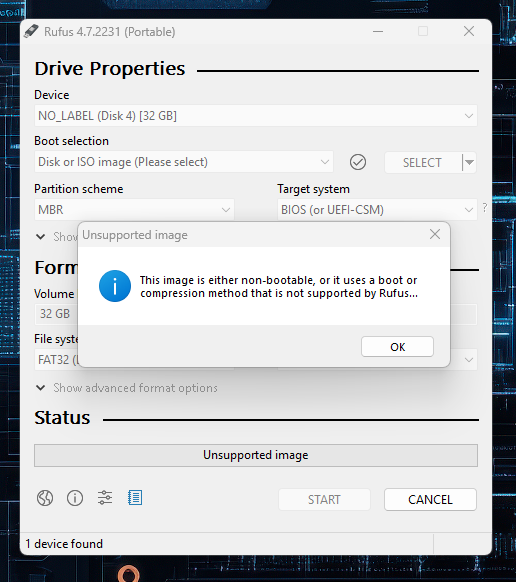
When I selected the ISO to burn through Rufus, Rufus started to scan the ISO (which I had never seen before), and few moments later, an error message popped up: “This image is either non-bootable, or it uses a boot or compression method that is not supported by Rufus…”
I had never had an issue with Rufus before, so I took to the web. I found out that I was not the only one having issues with the latest versions of OPNsense. there were posts after posts with several answers on how to possibly fix it. One such answer was to use BalenaEtcher, but it, too, had an issue with the ISO image:
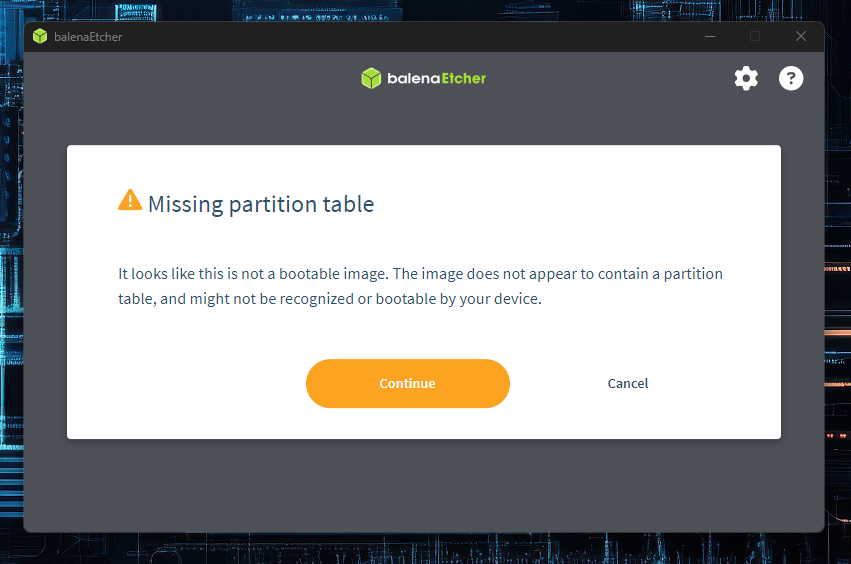
It too failed to see a bootable partition. So, back to the forums I go, and the next solution is to go as basic as possible, and that is to use the Linux command “dd”. Now, of course, those of us who use Windows as our primary system may not have a Linux box lying around. Luckily, I just happen to have an old laptop running Linux at my desk, so I was able to run the commands without error:
|
1 |
sudo dd if=OPNsense-25.1-dvd-amd64.iso of=/dev/sdb bs=16k |
However, upon trying to boot from the USB, it still failed.
I had one last trick up my sleeve I wanted to try before giving up. And that was to use my ISO emulator (IODD ST400) and add the iso to it. Unfortunitelly I just moved recently, and had no idea where I had put the damn thing (might have to buy a new one).
But I thought about another possibility, well, for Windows and Mac Users anyway. That Linux laptop I just mentioned… well, I had just installed Fedora on it, and I had some issues with it as well, so I used the Fedora Media Writer to get Fedora onto my USB stick, so why not try it to get OPNsense on one?
Well…. It Worked!
Here is how to use it:
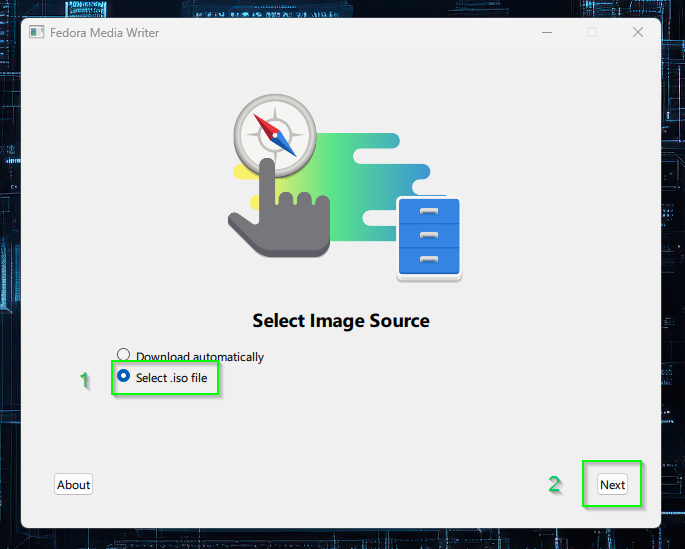
1. Make sure to select the “Select .iso file” option then
2. Hit Next:
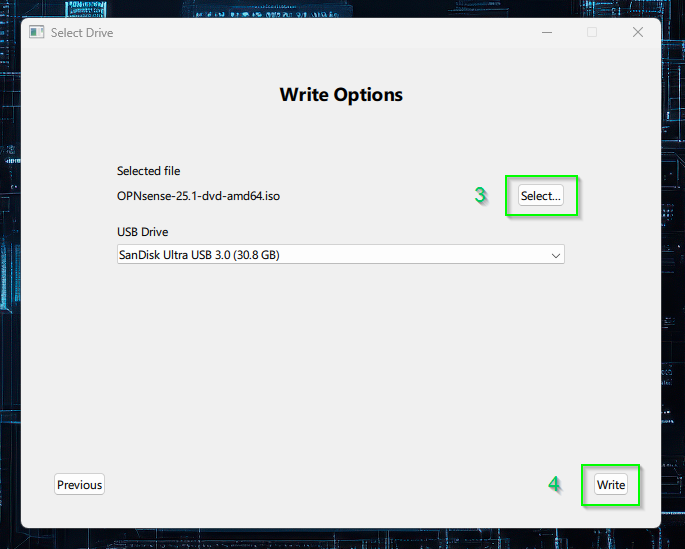
3. Select your OPNsense ISO
4. Write
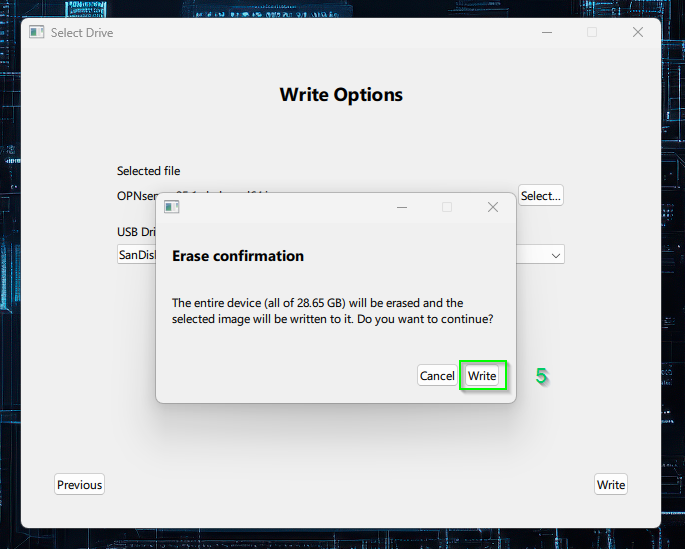
5. You will get the usual warning that all space on the current USB will be wiped out
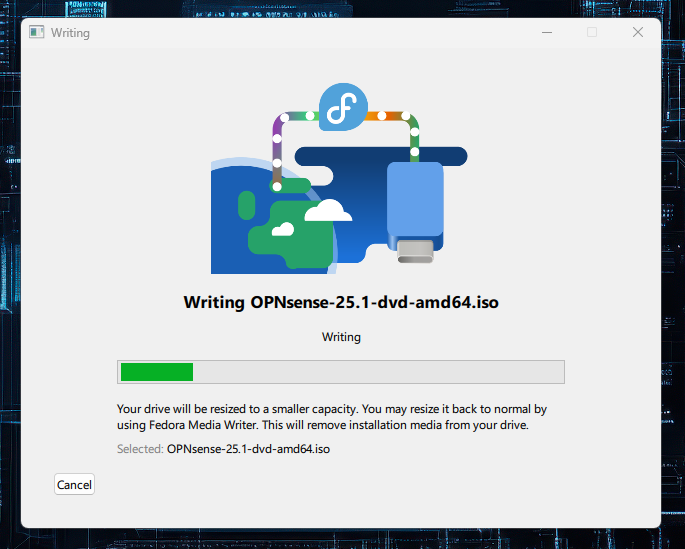
Then you will see that the iso is successfully being written to the USB.
This was the ONLY way I was able to successfully and easily boot OPNsense from a USB drive. Hope this helps.
Now, as for my adventure with OPNsense… I was able to make it work for about 5 minutes… then some how, something I did screwed everything us and I had to revert back to my old internet setup. I will attempt to try again soon, but I might go with pfSense and give it a whirl.